OAuth 2.0 for Traefik Gateway
The traefik gateway is used to serve the DTaaS. All the services provided as part of the application are secured at the traefik gateway. The security is based on Traefik forward-auth.
An illustration of the docker containers used and the authorization setup is shown here.
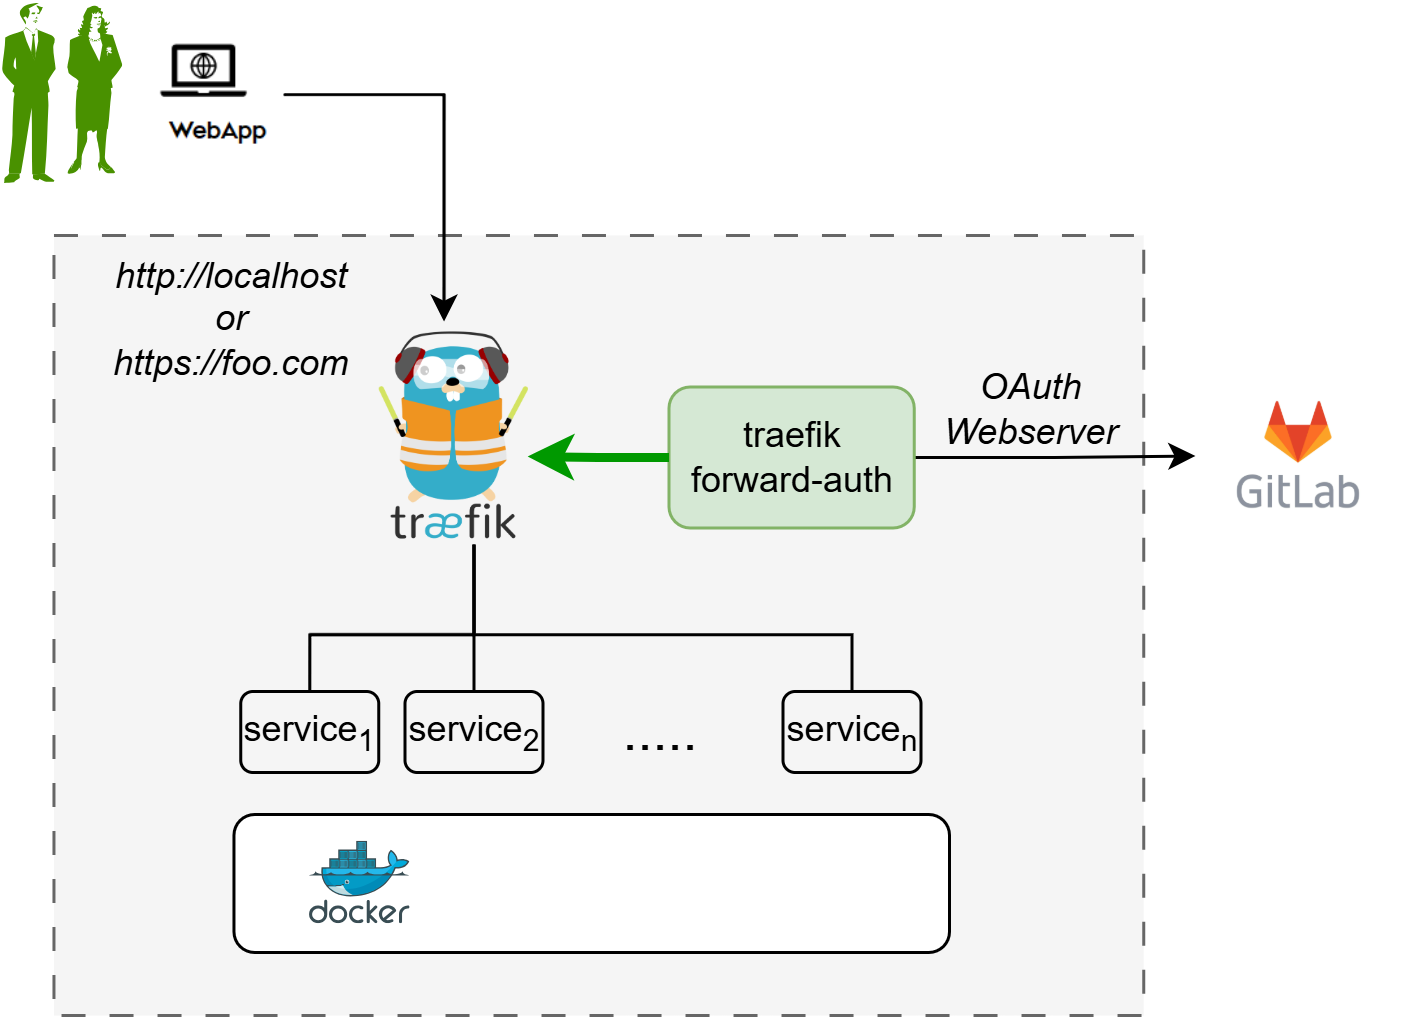
The traefik forward-auth can use any OAuth 2.0 provider, but within the DTaaS GitLab is used as authorization provider. The OAuth 2.0 web / server application authorization flow is utilized.
The following steps outline the configuration process:
1. Choose GitLab Server:
- OAuth 2.0 authorization must be set up on a GitLab server. An on-premise GitLab installation is preferrable to commercial https://gitlab.com.
- The GitLab Omnibus Docker can be used for this purpose.
- The OAuth 2.0 application should be configured as an instance-wide authorization type. The options to generate client secret and trusted application should be selected.
2. Determine Website Hostname:
Before setting up OAuth 2.0 on GitLab, the hostname for the website should be determined. A self-hosted GitLab instance is recommended, which can be used in other parts of the DTaaS platform.
3. Determine Callback and Logout URLs:
For the web / server authorization flow to function correctly, two URLs are required: a callback URL and a logout URL.
- The callback URL informs the OAuth 2.0 provider of the page where signed-in users should be redirected. It represents the landing homepage of the DTaaS platform. (either http://foo.com/_oauth/ or http://localhost/_oauth/)
- The logout URL is the URL for signout of gitlab and clear authorization within traefik-forward auth. (either http://foo.com/_oauth/logout or http://localhost/_oauth/logout). The logout URL is to help users logout of traefik forward-auth. The logout URL should not be entered into GitLab OAuth 2.0 application setup.
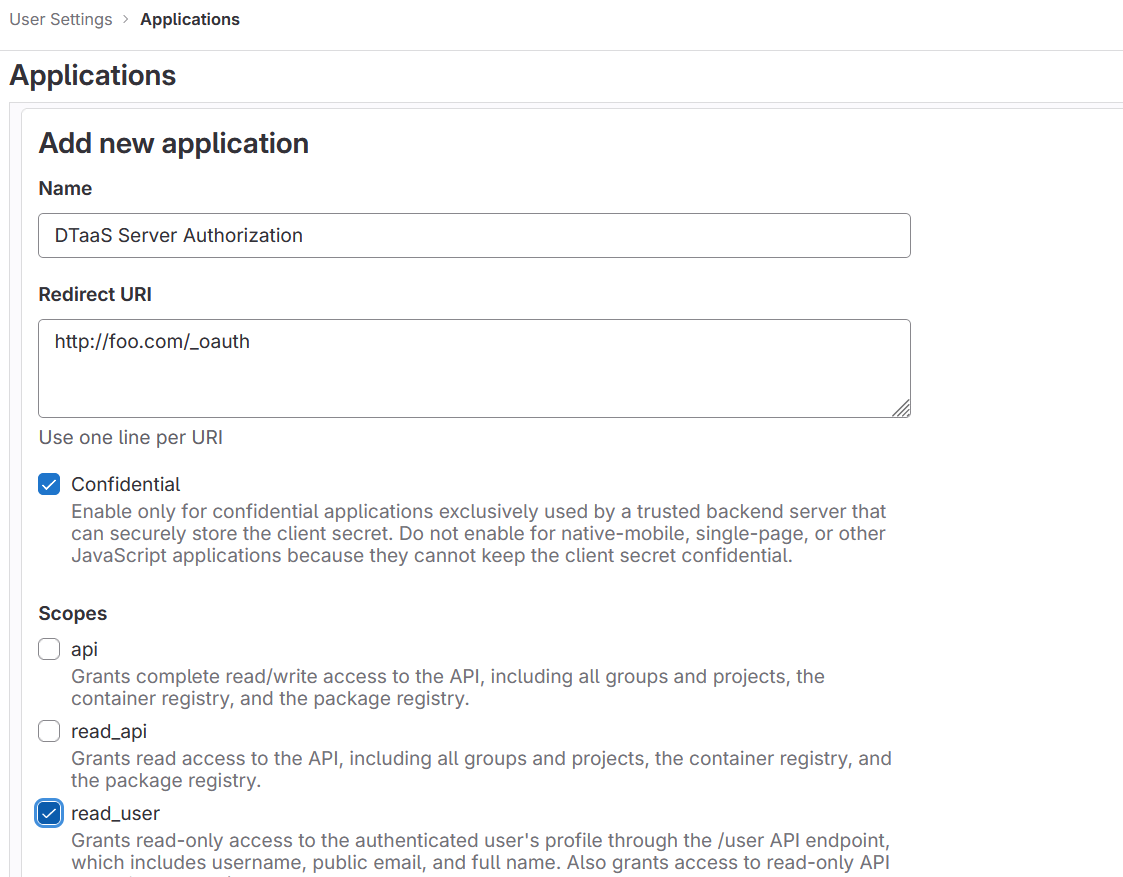
4. Create OAuth 2.0 Application:
OAuth 2.0 application setup on GitLab can be located at Edit Profile -> Application https://gitlab.foo.com/-/profile/applications.
During the creation of the OAuth 2.0 application on GitLab, the scope must be specified. The read_user scope should be selected.
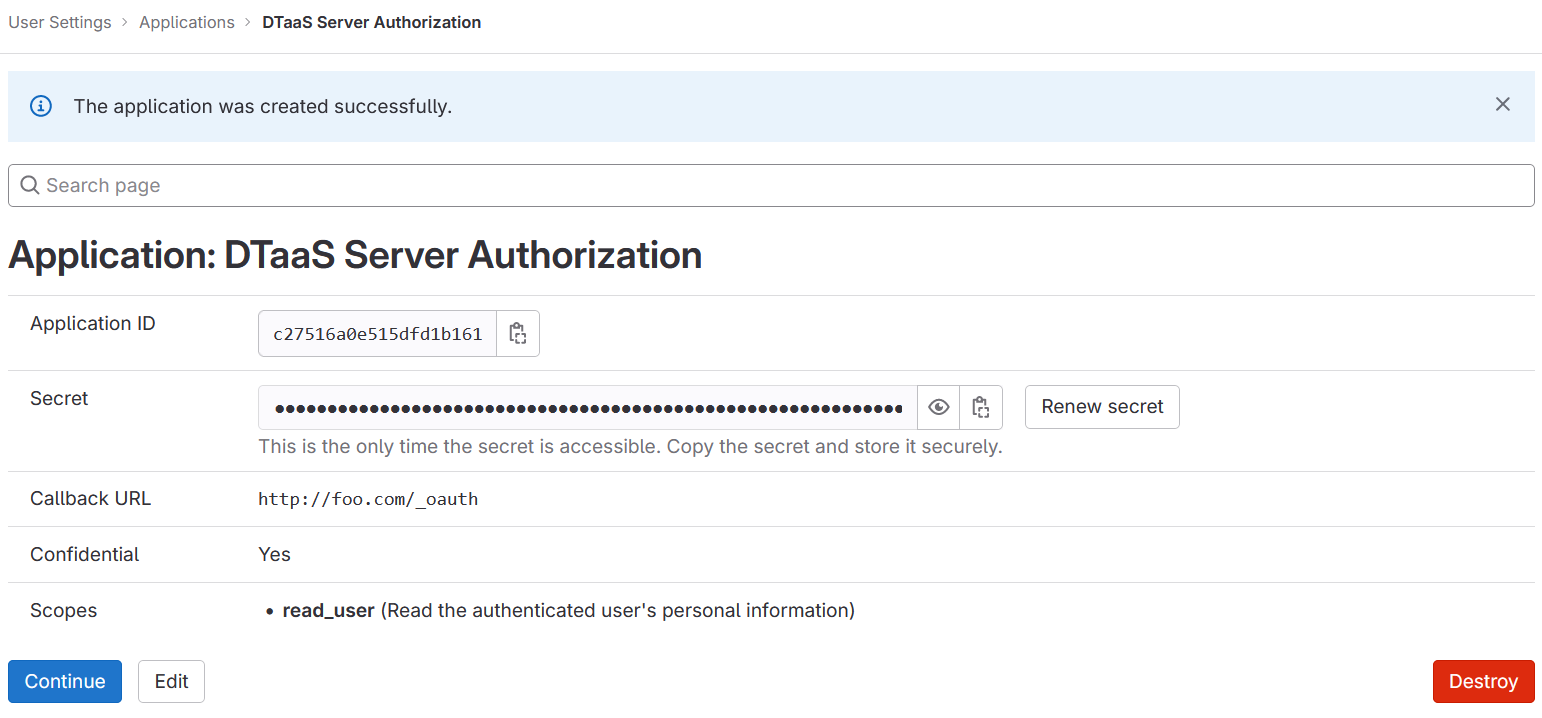
5. Copy Application Credentials:
After successfully creating the OAuth 2.0 application, GitLab generates an application ID and client secret.
Both these values are long strings of HEX values that are required for the configuration files.
6. Checklist: Required Information from OAuth 2.0 Application:
The following information is required from the OAuth 2.0 application registered on GitLab:
| GitLab Variable Name | Variable Name in .env of docker compose file | Default Value |
|---|---|---|
| OAuth 2.0 Provider | OAUTH_URL | https://gitlab.foo.com/ |
| Application ID | OAUTH_CLIENT_ID | xx |
| Application Secret | OAUTH_CLIENT_SECRET | xx |
| Callback URL | (to be directly entered in GitLab OAuth 2.0 registration) | |
| Forward-auth secret | OAUTH_SECRET | random-secret-string (password for forward-auth, can be changed to your preferred string) |
| Scopes | read_user |
Development Environment
The development environment and server installation scenarios requires traefik forward-auth.
Configure Authorization Rules for Traefik Forward-Auth
The Traefik forward-auth microservices requires configuration rules to manage authorization for different URL paths. The conf.server file can be used to configure the specific rules. There are broadly three kinds of URLs:
Public Path Without Authorization
To setup a public page, an example is shown below.
Here, 'noauth' is the rule name, and should be changed to suit rule use. Rule names should be unique for each rule. The 'action' property is set to "allow" to make the resource public. The 'rule' property defines the path/route to reach the resource.
Common to All Users
To setup a common page that requires GitLab OAuth 2.0, but is available to all users of the GitLab instance:
The 'action' property is set to "auth", to enable GitLab OAuth 2.0 before the resource can be accessed.
Selective Access
Selective Access refers to the scenario of allowing access to a URL path for a few users. To setup selective access to a page:
The 'whitelist' property of a rule defines a comma separated list of email IDs that are allowed to access the resource. While signing in users can sign in with either their username or email ID as usual, but the email ID corresponding to the account should be included in the whitelist.
This restricts access of the resource, allowing only users mentioned in the whitelist.
User management
DTaaS provides an easy way to add and remove additional users from your DTaaS instance.
All such user management can be done via the DTaaS CLI
Limitation
The rules in _conf._ file are not dynamically loaded into the traefik-forward-auth microservice. Any change in the conf file requires restart of traefik-forward-auth for the changes to take effect. All the existing user sessions get invalidated when the traefik-forward-auth* restarts.
Use a simple command on the terminal.
- For a local instance:
- For a server instance running in HTTP mode:
- For a server instance running in HTTPS mode: