DTaaS Vagrant Box
This document provides instructions for creating a custom Operating System virtual disk for running the DTaaS platform. The virtual disk is managed by vagrant. The purpose is two-fold:
- Provide cross-platform installation of the DTaaS platform. Any operating system supporting the use of vagrant software utility can support installation of the DTaaS platform.
- Create a ready-to-use development environment for code contributors.
There are two scripts in this directory:
| Script name | Purpose | Default |
|---|---|---|
user.sh |
user installation |  |
developer.sh |
developer installation |  |
If you are installing the DTaaS for developers, the default installation caters to your needs. You can skip the next step and continue with the creation of vagrant box.
If additional software installation is desired for developers, the
Vagrantfile needs to be modified. The existing Vagrantfile has two lines:
Uncomment the second line to have more software components installed. If you
are not a developer, no changes are required to the Vagrantfile.
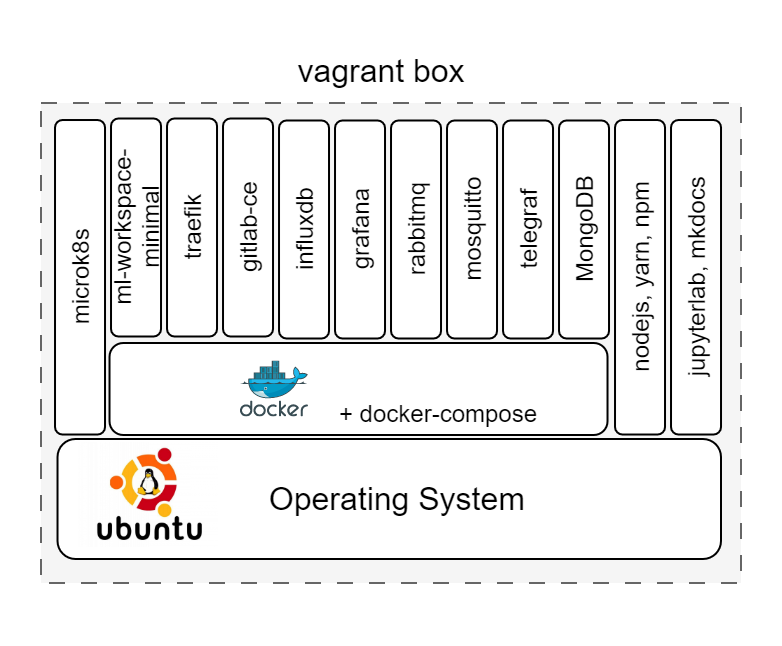
This vagrant box installed for users will have the following items:
- docker v24.0
- nodejs v20.10
- yarn v1.22
- npm v10.2
- containers - ml-workspace-minimal v0.13, traefik v2.10, gitlab-ce v16.4, influxdb v2.7, grafana v10.1, rabbitmq v3-management, eclipse-mosquitto (mqtt) v2, mongodb v7.0
This vagrant box installed for developers will have the following items additional items:
- docker-compose v2.20
- microk8s v1.27
- jupyterlab
- mkdocs
- container - telegraf v1.28
At the end of installation, the software stack created in vagrant box can be visualised as shown in the following figure.
The upcoming instructions will help with the creation of base vagrant box.
References
Image sources: Ubuntu logo