Working with GitLab
The DTaaS platform uses GitLab for two purposes:
- OAuth 2.0 authorization service
- DevOps service
The admin documentation covers the OAuth 2.0 authorization configuration. This guide covers the git commands and project structure for the GitLab DevOps service within the DTaaS.
Preparation
First, create a GitLab project named after your username in the GitLab group named dtaas.
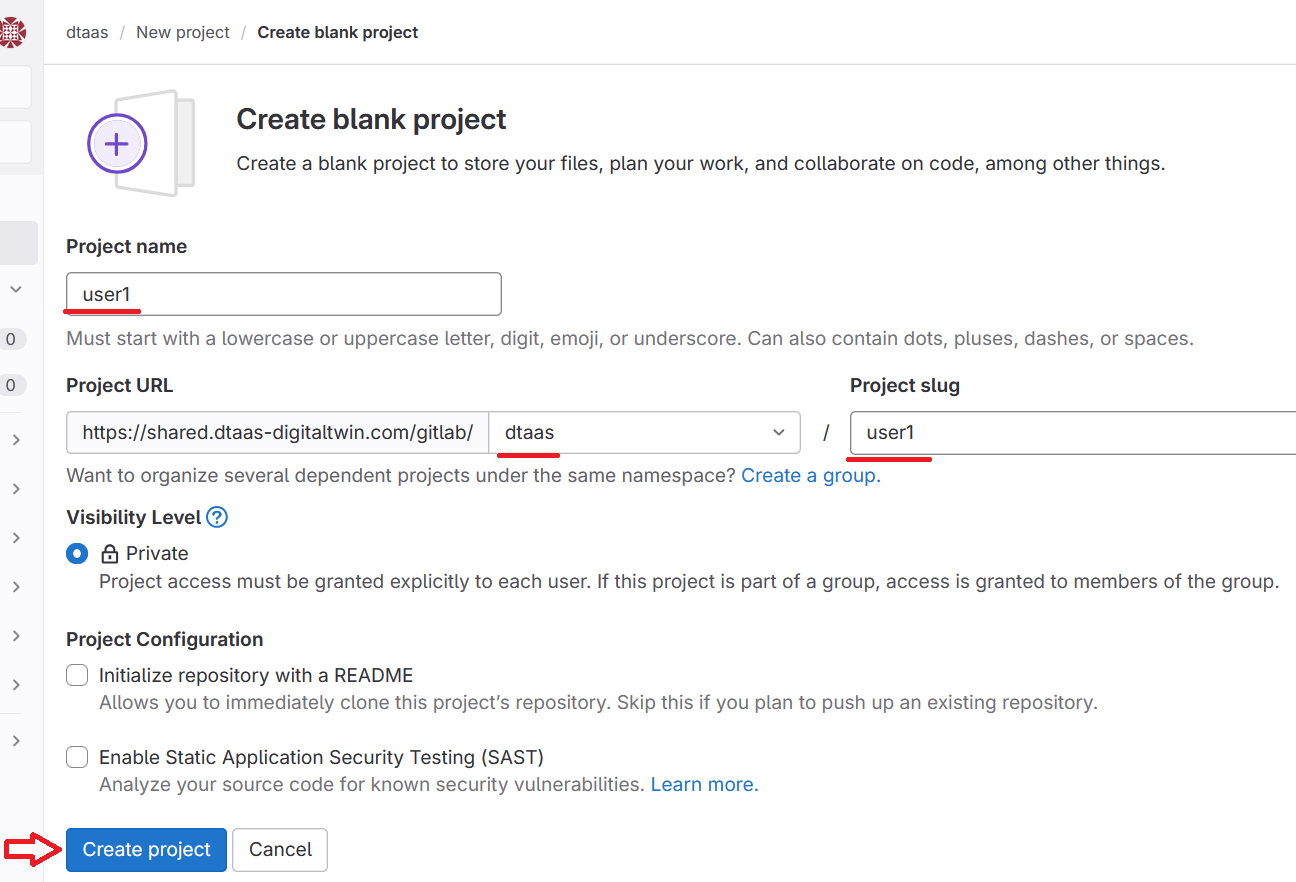
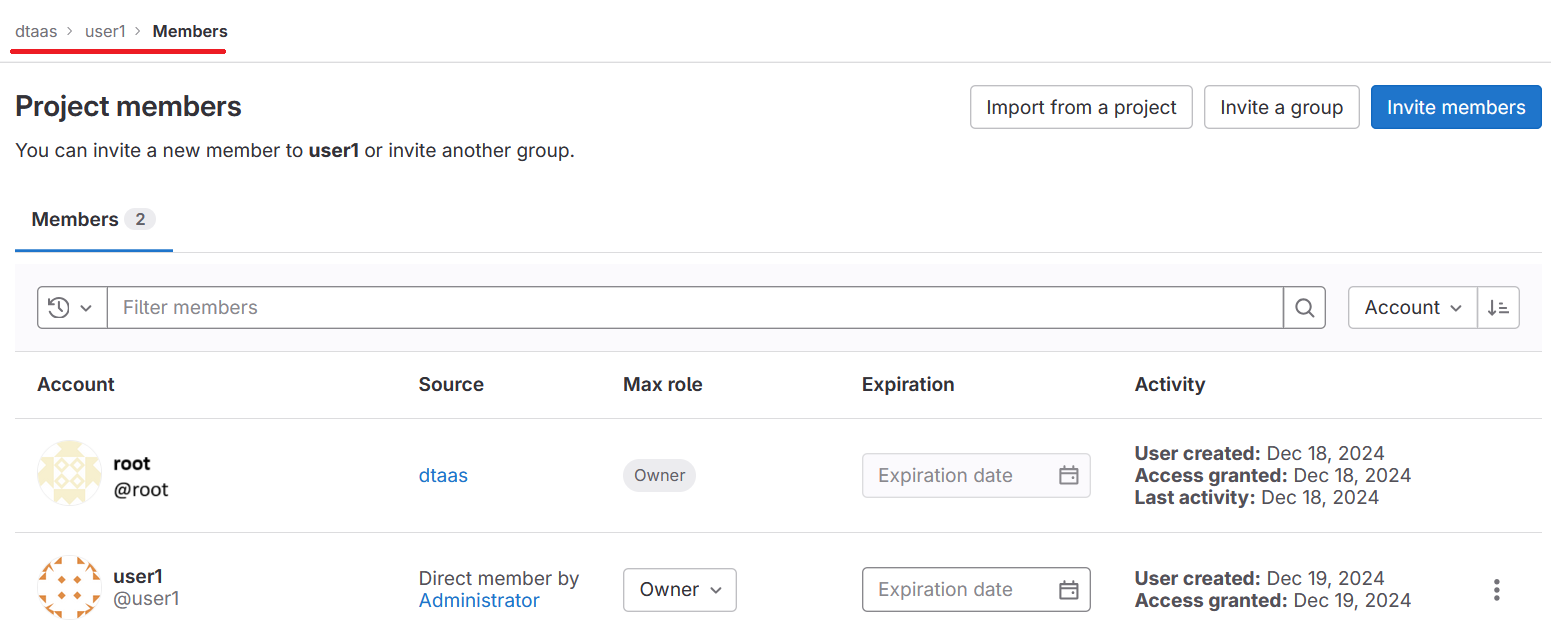
The user must have ownership permissions over the project.
Warning
By default, the DTaaS website expects a branch named
master to exist and performs all git operations on it.
A different branch can be set in the Branch Name field of the
settings page.
Git commands
Use the standard git commands and workflows. A GitLab project can be used as a remote git server in two ways:
- Over SSH using a personal SSH key
- Over HTTPS using personal access tokens (PAT)
This tutorial uses a PAT to work with the GitLab server.
First, create a PAT under User settings > Access > Personal access
tokens with Generate token > Legacy token, and tick the
write_repository scope.
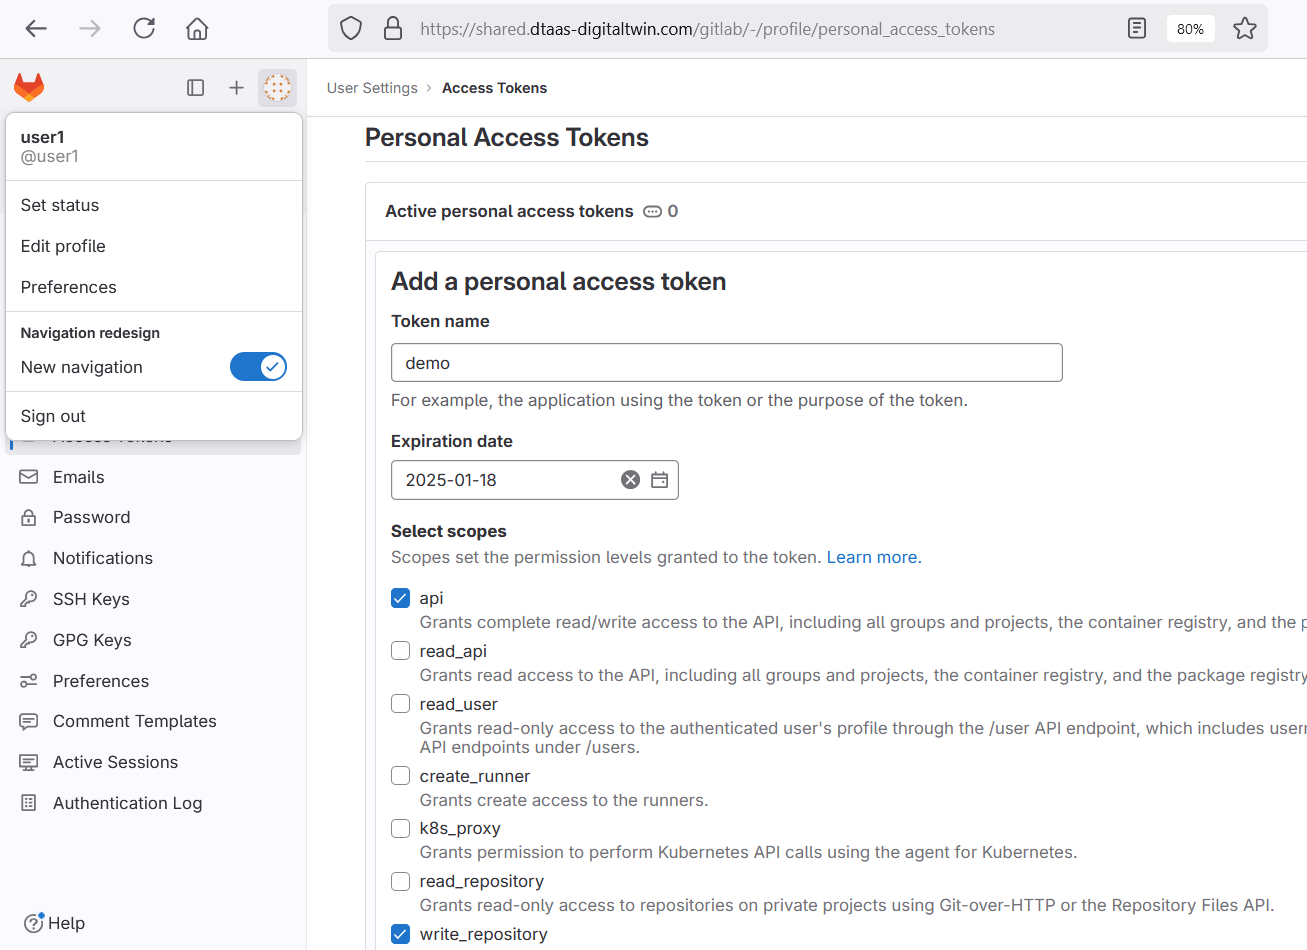
Copy the token and use it to clone the git repository.
Library Assets
GitLab stores the reusable Library assets of all users. Library assets, including digital twins, must follow a mandatory structure. A properly initialized GitLab project has the following structure.
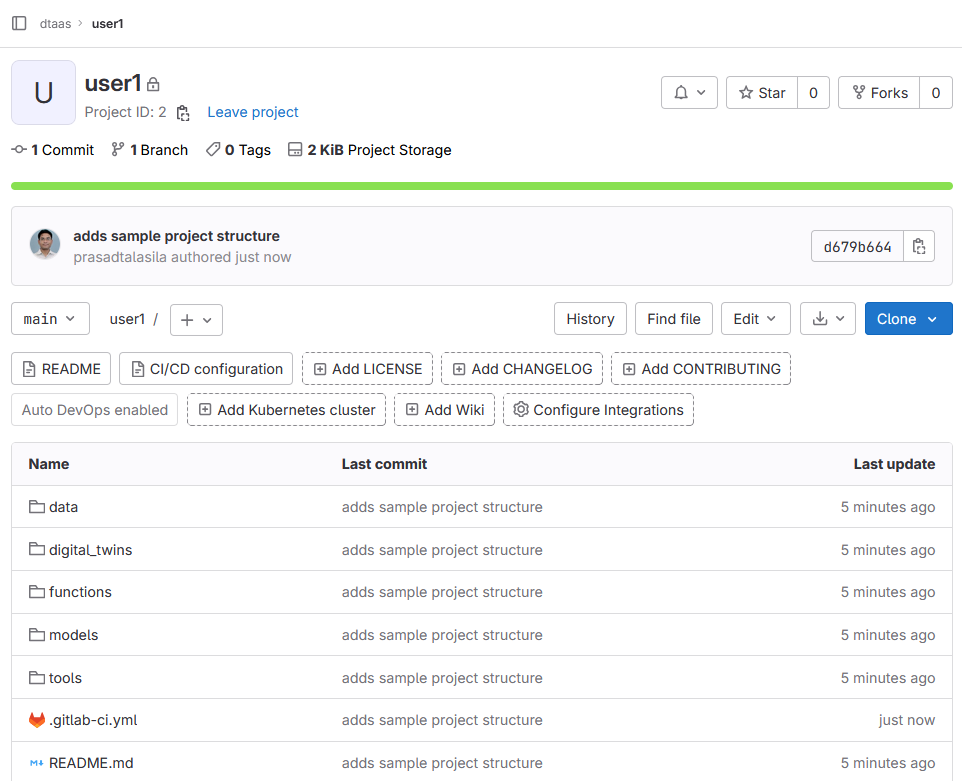
Pay special attention to .gitlab-ci.yml. It must be a valid
GitLab DevOps configuration. The
example repo has a sample structure.
For example, with PAT1 as the PAT for the
dtaas/user1 repository, the command to clone the repository is:
After adding the required Library assets:
Next Steps
A GitLab runner must be linked to the project repository. Some runners may already be installed with the DTaaS platform; check the runners page of the GitLab project. You can also install custom runners and link them to the repository.
You can then use the Digital Twins Page to access the DevOps features of the DTaaS platform.