GitLab Runner Integration
For Windows-specific setup guidance, see runner-windows.md.
This document outlines the steps needed to create a gitlab-runner
that will be responsible for the execution of Digital Twins. Many such
runners can be installed and linked with the integrated GitLab.
An illustration of the intended installation setup is shown below.
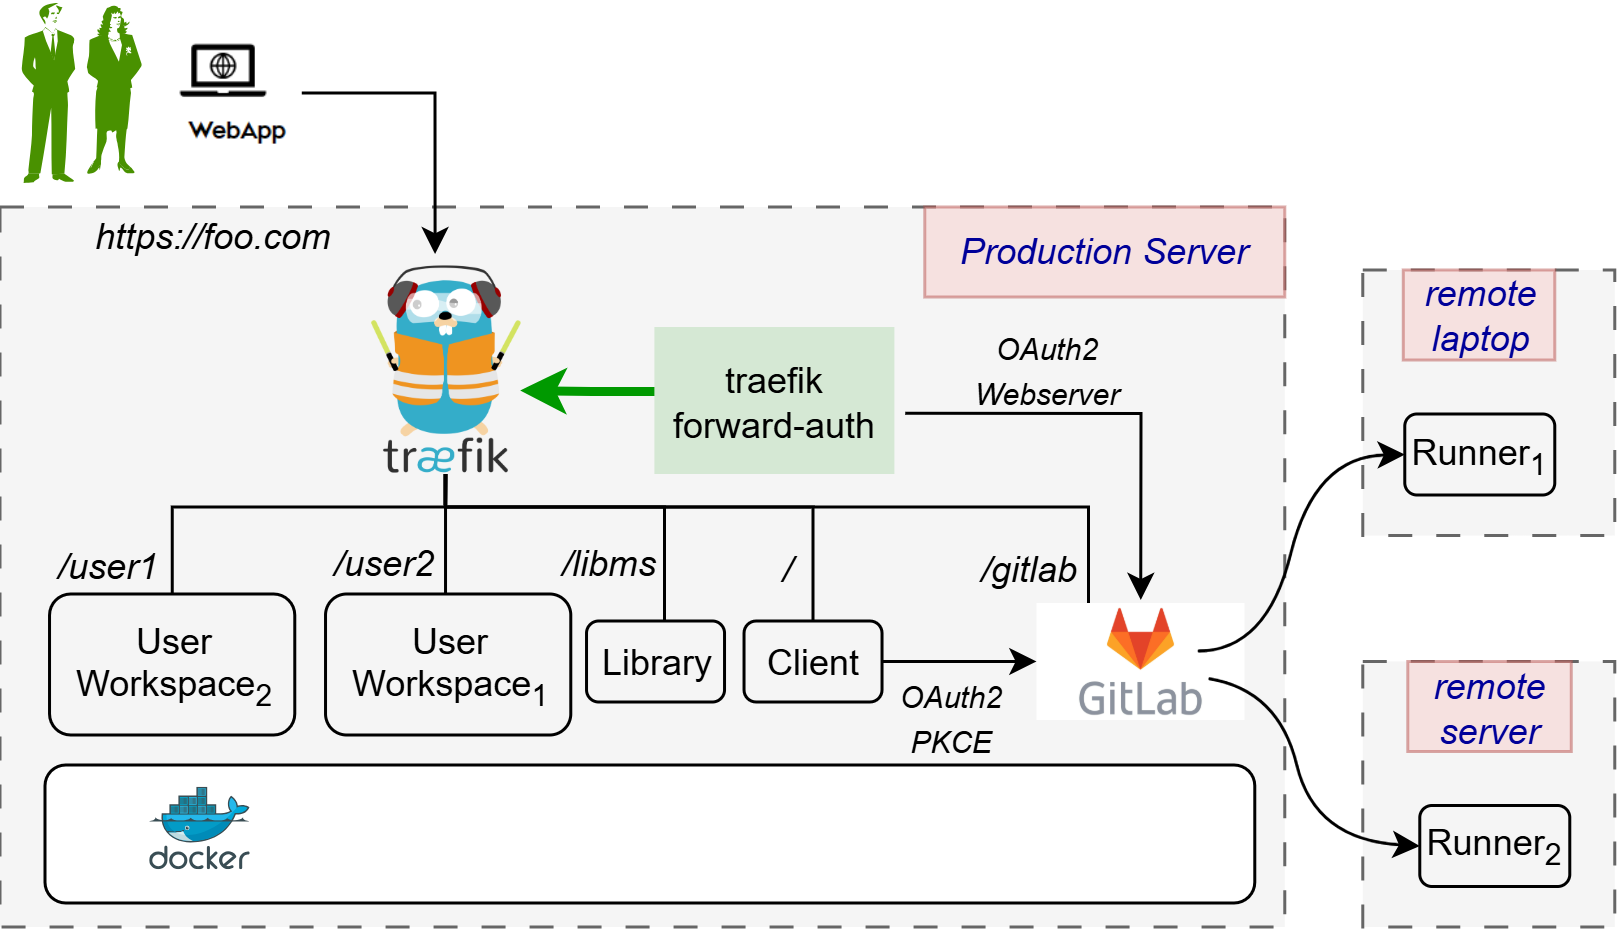
There are two installation scenarios:
- Localhost Installation - The integrated runner is used locally with
a GitLab instance hosted at
https://localhost/gitlab. - Server Installation - The integrated runner is used with a GitLab instance hosted on a production server. This server may be a remote server and not necessarily the host, and may have TLS enabled with a self-signed certificate.
Following the steps below sets up the integrated runner which can be used to execute digital twins from the Digital Twins Preview Page.
Prerequisites
A GitLab Runner picks up CI/CD jobs by communicating with a GitLab instance. For an explanation of how to set up a GitLab instance that integrates with a DTaaS platform, refer to the GitLab instance document and the GitLab integration guide.
The rest of this document assumes a running DTaaS platform with a GitLab instance is in place.
Runner Scopes
A GitLab Runner can be configured for three different scopes:
| Runner Scope | Description |
|---|---|
| Instance Runner | Available to all groups and projects in a GitLab instance. |
| Group Runner | Available to all projects and subgroups in a group. |
| Project Runner | Associated with one specific project. |
Creating instance runners is recommended as they are the most straightforward, but any type will work. More about these three types can be found on the official GitLab documentation page.
Obtaining A Registration Token
First, obtain the token necessary to register the runner for the GitLab instance. Open the GitLab instance (remote or local) and depending on the chosen runner scope, follow the steps given below:
| Runner Scope | Steps |
|---|---|
| Instance Runner | 1. On the Admin dashboard, navigate to CI/CD > Runners. 2. Select New instance runner. |
| Group Runner | 1. On the DTaaS group page, navigate to Settings > CI/CD > Runners. 2. Ensure the Enable shared runners for this group option is enabled. 3. On the DTaaS group page, navigate to Build > Runners. 4. Select New group runner. |
| Project Runner | 1. On the DTaaS group page, select the project named after the GitLab username. 2. Navigate to Settings > CI/CD > Runners. 3. Select New project runner. |
For any chosen scope, a page to create a runner will be displayed:
- Under Platform, select the Linux operating system.
- Under Tags, add a
linuxtag. - Select Create runner.
The following screen should then appear:
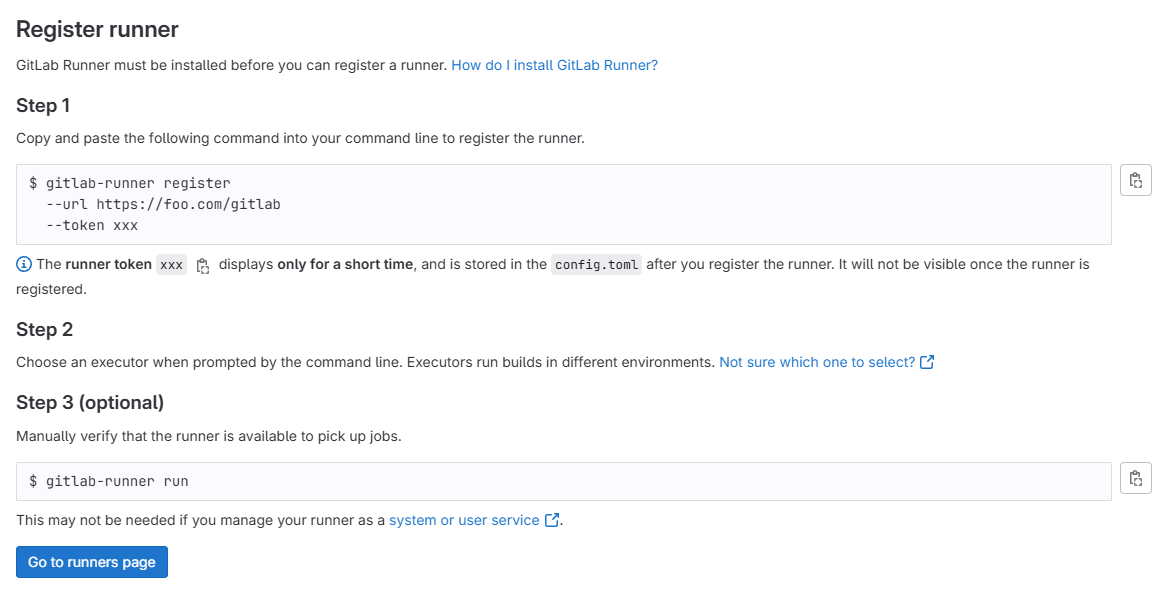
Be sure to save the generated runner authentication token.
Configuring the Runner
Depending on the installation scenario, the runner setup reads certain configuration settings:
- Localhost Installation (legacy compose files) uses
deploy/docker/.env.local. - Server Installation (legacy compose files) uses
deploy/docker/.env.server. - Integrated package installation uses
deploy/dtaas/docker/secure-server_with_integrated-gitlab/config/.env.
The runner compose templates under deploy/services/runner were originally
written for deploy/docker/* layouts. For package-based installs, update
certificate mount paths in compose.runner.local.yml and
compose.runner.server.yml to match the active package directory.
The runner must be registered with the GitLab instance so that they may
communicate with each other. deploy/services/runner/runner-config.toml
has the following template:
- Set the
urlvariable to the URL of the GitLab instance. - Set the
tokenvariable to the runner registration token obtained earlier. - For the server installation scenario, remove the line
network_mode = "host".
A list of advanced configuration options is provided on the GitLab documentation page.
Start the GitLab Runner
The following commands may be used to start and stop the gitlab-runner
container respectively, depending on the installation scenario:
-
Go to the DTaaS home directory (
DTaaS_DIR) and execute one of the following commands. -
Localhost Installation
-
Server Installation
For package-based integrated installations, use the same compose files but set
--env-file to
deploy/dtaas/docker/secure-server_with_integrated-gitlab/config/.env and
adjust the certificate volume mounts in the compose file accordingly.
Once the container starts, the runner within it will run automatically. Whether the runner is operational can be verified by navigating to the page where the runner was created. For example, an Instance Runner would look like this:
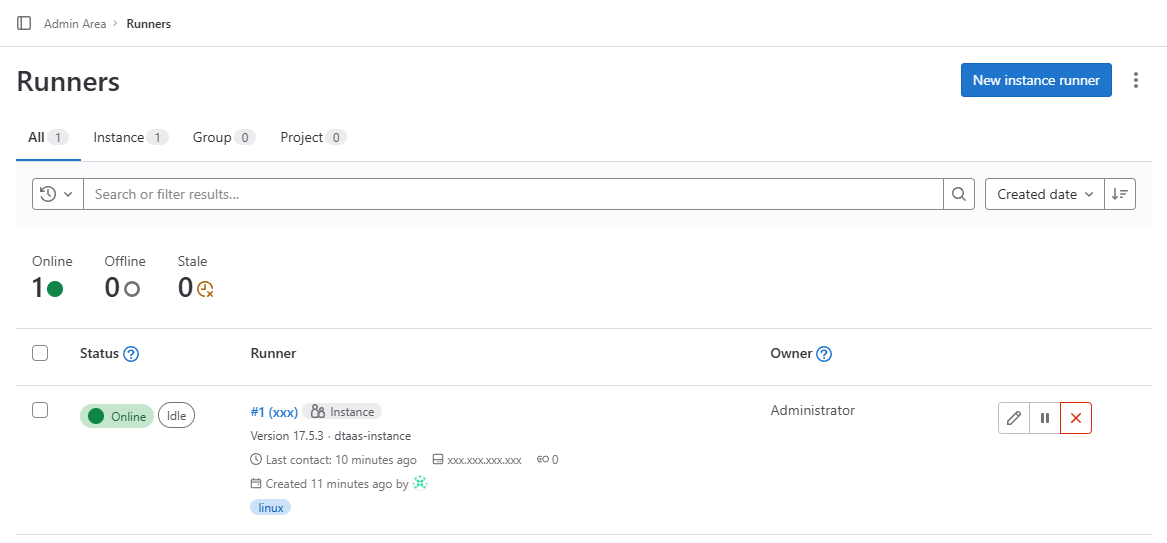
A GitLab runner is now ready to accept jobs for the GitLab instance.
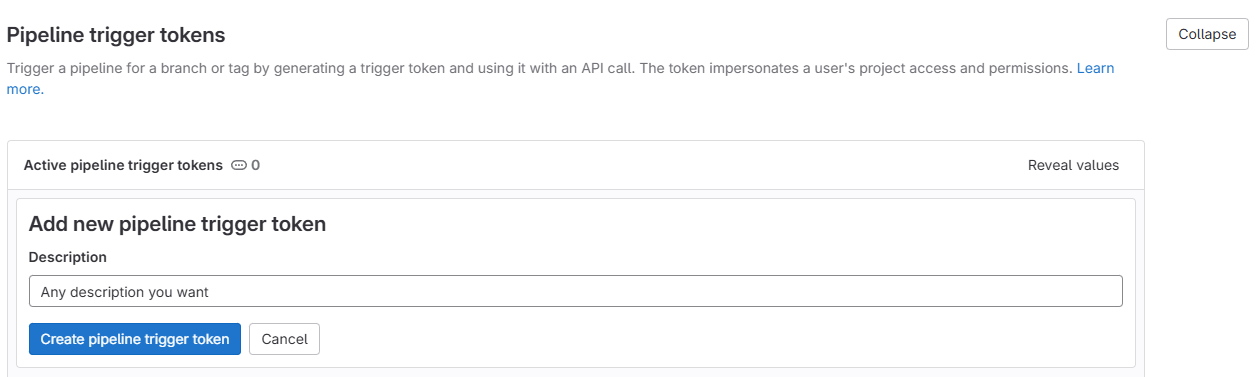
Pipeline Trigger Token
The Digital Twins Preview Page uses the GitLab API which requires a Pipeline Trigger Token. Go to the project in the DTaaS group and navigate to Settings > CI/CD > Pipeline trigger tokens. Add a new token with any description as desired.
The Digital Twins Preview Page can now be used to manage and execute digital twins.