 Install DTaaS on Localhost (GUI)
The installation instructions provided in this document are ideal for running DTaaS on localhost via a Graphical User Interface (GUI). This installation is ideal for single users intending to use DTaaS on their own computers.
Two installation scenarios are available:
| Scenario | Auth Provider | External Account Required |
|---|---|---|
| DTaaS Localhost | GitLab OAuth | Yes (gitlab.com) |
| Workspace Localhost | Dex (local) | No |
 Requirements
- Docker Desktop or Docker Engine with Compose plugin
- Portainer Community Edition (setup below)
 Download Packages
Download the required packages:
- dtaas-localhost-xx.zip for DTaaS localhost installation, or
- workspace-dex-localhost-xx.zip for Workspace localhost installation
Tip
The guide uses Linux-style paths such as /Users/username/DTaaS.
On Windows use an equivalent path, for example C:\DTaaS.
 Start Portainer
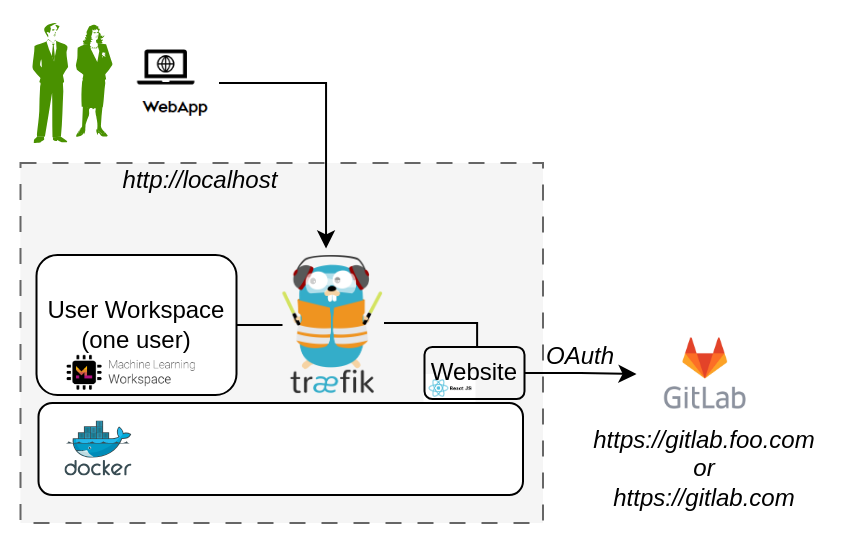
Portainer Community Edition provides a graphical
interface for managing Docker containers at https://localhost:9443.
Follow the official Portainer CE documentation or run the commands below:
Open https://localhost:9443 and complete the
Initial Setup
to create an administrator account.
Tip
To restart Portainer later, run docker start portainer.
1.  DTaaS Localhost
Unzip dtaas-localhost-xx.zip package. It contains required installation files. This installation scenario uses GitLab OAuth for authentication. A GitLab account on https://gitlab.com is required.
1.1 Configuration
1.2 Create Configuration Files
Copy the example files:
1.3 Environment Variables
Edit config/.env:
| Variable | Example | Description |
|---|---|---|
USERNAME |
user1 |
Workspace path prefix and folder name |
COMPOSE_PROJECT_NAME |
dtaas |
Docker Compose project name |
1.4 Client Configuration
This is an optional step. If a dedicated OAuth 2.0 application
is required for the localhost installation, follow these
steps. Upon successful creation of the OAuth
application, edit config/client.js and set the OAuth application
credentials from the GitLab account:
| Variable | Example | Description |
|---|---|---|
REACT_APP_CLIENT_ID |
(OAuth app id) | GitLab OAuth application ID |
REACT_APP_AUTH_AUTHORITY |
https://gitlab.com/ |
OAuth authority URL |
Tip
See the client auth docs for details on creating a GitLab OAuth application.
1.5 Create User Workspace
Create a workspace directory for the user set in USERNAME:
1.6 Create the Portainer Stack

- Navigate to Stacks and click Add Stack.
- Name the stack, for example
dtaas-localhost. - Select the Upload build method.
- Upload the compose file (
docker-compose.yml). - Load the environment file (
config/.env).
Tip
If the .env file is not visible, select All Files in the
file explorer dialog.
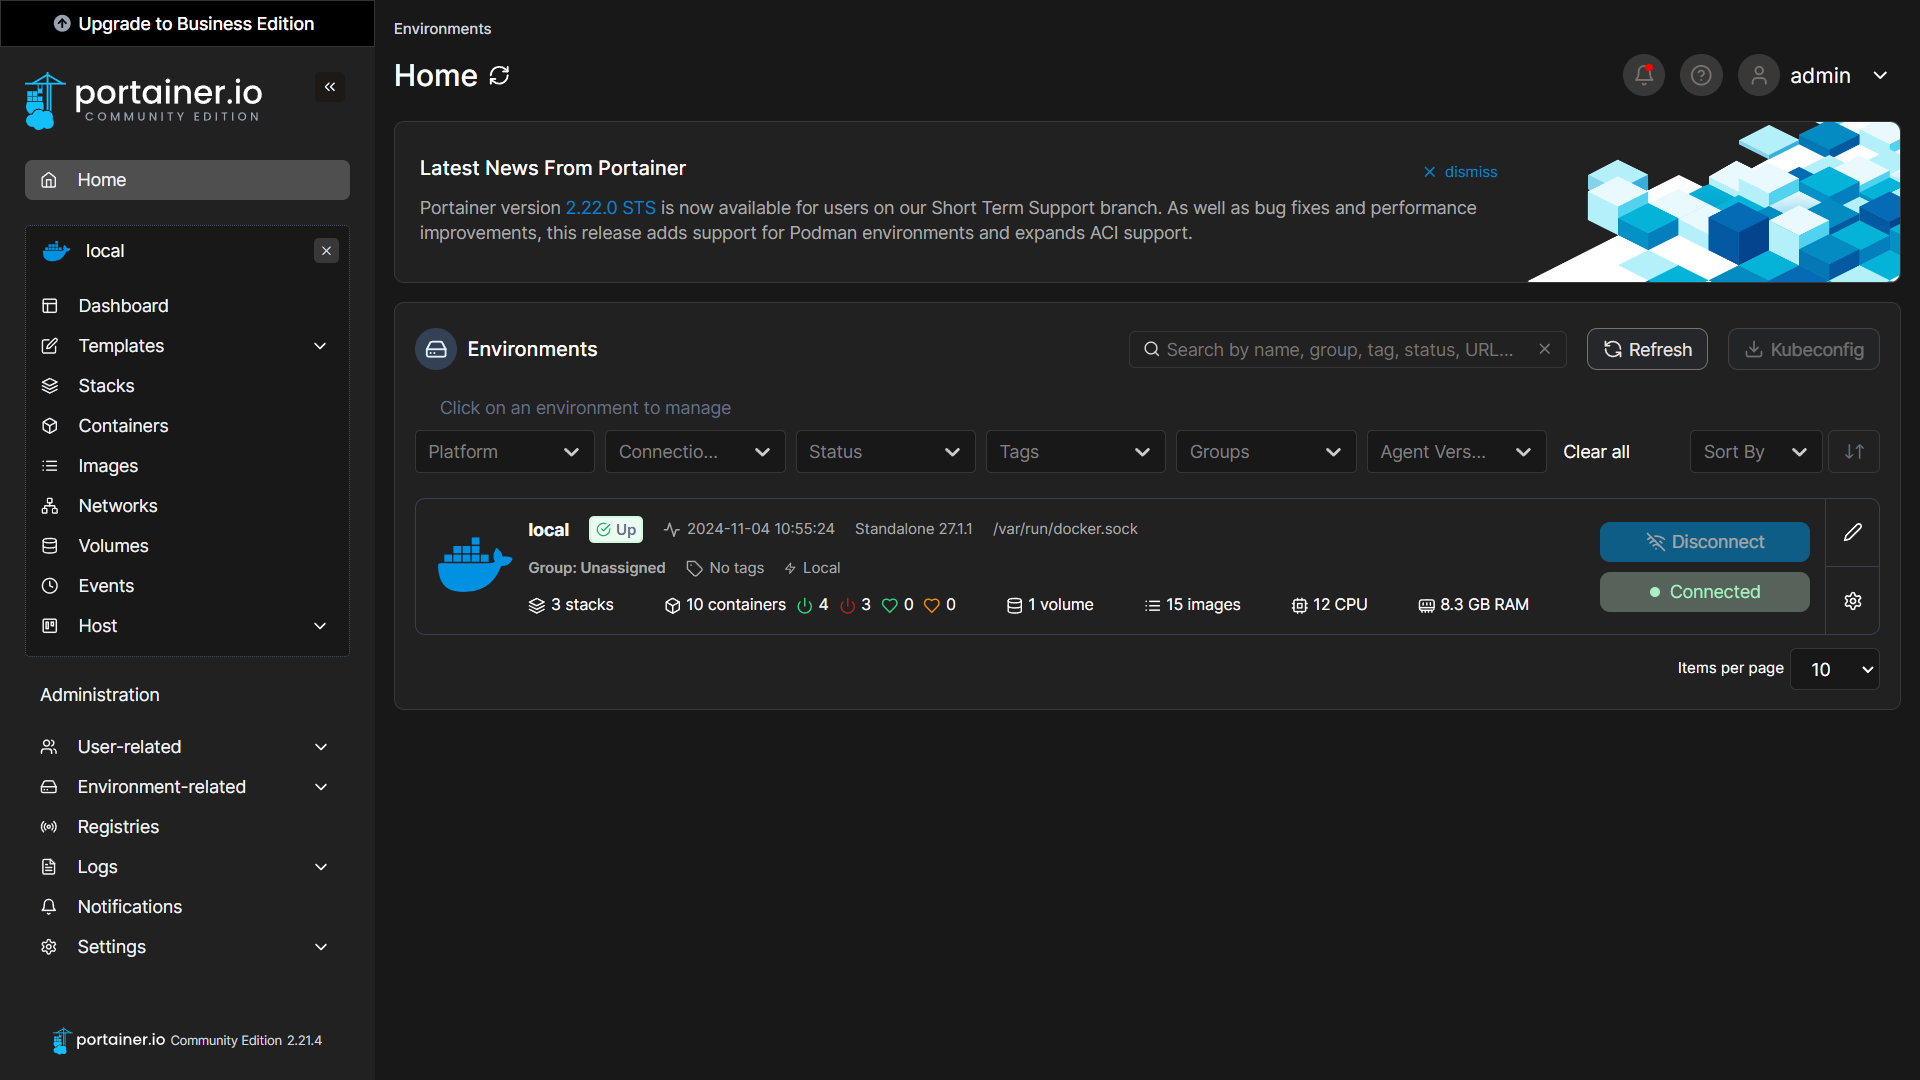
Click Deploy the stack. A new stack with this name gets created. It has the following view.

1.7 Use
Open http://localhost in a web browser and sign in with the configured GitLab credentials.
1.8 Limitations
The library microservice and backend forward-auth are not included in this scenario.
2.  Workspace Localhost
Unzip workspace-dex-localhost-xx.zip package. It contains required installation files.
This scenario uses Dex as a local identity provider. No external account is required; default credentials are provided.
2.1 Configuration
Copy the example files:
2.2 Environment Variables
Edit .env:
| Variable | Example | Description |
|---|---|---|
COMPOSE_PROJECT_NAME |
dtaas |
Docker Compose project name |
DEFAULT_USER |
user |
Default user login profile for Dex |
Tip
Local login users may be customised in
deploy/workspace/dex/localhost/config/dex-config.yaml.
2.3 Create the Portainer Stack
- Navigate to Stacks and click Add Stack.
- Name the stack, for example
workspace-localhost. - Select the Upload build method.
- Upload the compose file (
docker-compose.yml). - Load the environment file (
.env).
Click Deploy the stack.
2.4 Use
Open http://localhost in a web browser. Sign in using the default Dex credentials:
- Email:
user@intocps.org - Password:
user
2.5 Limitations
- The library microservice is not included in this scenario.
- DevOps features are not available.
- See custom user instructions for changing the default credentials.
References
Image sources: Traefik logo, reactjs, gitlab